Welcome!

Thanks for visiting my blog!
Make sure to leave a comment so I know you were here :)
Enjoy your visit!
Kathy


Follow me on Pinterest!

Follow Me on Pinterest

My New Shabby Chic Craft Room

Sunday, May 13, 2012

My homemade distress ink blending tools and how to made them!

Well I decided that I wanted to have a blending tool for all 45 of my distress ink colors (plus the hopefully 3 more seasonal inks and 12 more regular colors that come out) and as you know at $4.99 each this could get very expensive very fast. So I decided to check out you tube and the internet and see what everyone else was doing about this problem. I found that people were making their own from blocks!

I was storing all of my pads in the baseball card page protectors labeled with my label maker and this storage worked fine but when you keep switching the pads on the blending tool they tend to wear out way faster. You can see where I tore the corner of my worm lipstick pad trying to pull it off for the twentieth time lol


So I went on ebay and found a store called quality_lumber, Greg who runs the store is awesome, I just went on one of his auctions, clicked on ask seller a question, and asked him if he could make me a custom size (1 1/2" wide x 2" long x 1/2" thick) and he said yes! So I got 60 of them with shipping for like $17 you can't beat that deal! I do also have his email that he said I could share with you if you would like it just let me know and I will send it to you privately. Once they arrived (which was within days!) I just did a minium amount of sanding on the ends (that's all they really needed) I ordered this size because I wanted them to fit on the same shelf as they ink that they match in my napa valley cassette tape holder. Which they do not fit so my next post I will share the ink pad shelf that I am making to hold of my inks and blocks :)


Once the ends were all sanded I began adding the Velcro. I ordered 5 yards of 1" wide Self Adhesive Velcro on eBay for $8.90 with shipping which puts me at a cost of $25.90 for 60 blending tools which sounds pretty good to me at .43 cents each :) 
Now I was going to just put one strip in the middle like this ...


I am so glad that I tried this out before doing all 60 blocks lol because the Velcro didn't cover all of the blending foam doing it this way, when I went to rub the block around, the foam that didn't have any Velcro under it tended to curl under. Now note that I am only putting the hook (hard) side of the Velcro on the blocks. 
So I decided to put the Velcro strips in the other direction and add two of them which works perfectly!

(I gave the soft side to my hubby to play with lol and he was all excited until he saw I only gave him the soft side hehehe)


Then just add your foam!


Now because I usually have more than one color out at a time I wanted to label the tops of them so I would know what color they were when they were all mixed up. I just went into Word and made a table with lines so it was easier to cut them, added the names to the top of each square and left myself enough room to stamp a small flourish in the color of that particular block. You don't really need the stamped image if you don't want it, I just thought it made my label prettier :) 
I do also have these files (there are two of them) that I am more than happy to share with you so all you have to do is open and print. Of course I don't know how to share them here so just ask and I will happily send them to you :)


After I got all my labels stamped and cut I just put them on my blocks with the wide roll of packaging tape, the tap was the perfect size to cover the top of my block so I could attach my labels with just one piece over the top :)


and of course most of my labels went on straight and perfect but I happened to take a picture of one of the crooked ones lol but there you have it ink blending tools for .43 cents each and an hour or two of crafty fun putting them together :)

On a somewhat related note here is a tip I got directly from Tim Holtz in case you ever run into this problem......When I opened up my new squeezed lemonade distress ink pad, the pad wasn't glued to the base so I emailed Tim to find out what glue he recommended using that would actually stick to the pad and make the pad stick to the base and this is what he told me!
"you can adhere it with super glue.  just apply it to the inside base of the case and set the pad into the glue.  let it sit for about 10-15 minutes and it should be good to go."
as I told Tim I didn't even wait the 10-15 minutes lol I probably waited about 5 if that and it worked perfectly! Nope no patience here :P
So that wraps up this post and I hope it helps someone out :) I am hoping to put my ink shelf together today as hubby just left to go get more spray paint as I am typing this sentence lol He is spray painting the core board for me because he spray paints better than I do and it's mother's day so he is being extra nice to me :D since he really should be working on his truck lol

Hoping you all have a wonderful Mother's day!!


Sunday, November 20, 2011

Ribbon & Christmas Lights Garland

Well it has been forever since I have posted to my blog or scrapbooked anything. But I have recently found Pinterest, for those of you who don't know what this is, it is an online bulletin board. When you see a recipe, craft project, cool saying, a picture or anything you can pin it to your board and then see it anytime. Well I found a strand of Christmas light that had ribbon tied to it. Well since I have a bazillion yards of ribbon I just had to do this and I thought I would share the results here on my blog :)
Hoping you all have a wonderful Holiday Season!


Tuesday, November 2, 2010

My Tag & Backgrounds made with Perfect Pearl Mists

I tried to get some good pictures, and these actually look a lot cooler in person but here they are :)
This is the tag that I did, you can see some of the mist in the top right corner, the whole tag actually glimmers like that.
Here is the tag scanned, the light from the scanner made it look grungy though lol and there is actually mist on the ribbon too that you can't see.

 Then here is a shot of one of the backgrounds with the camera that shows more of the shimmer
Then here are the scanned images, I will probably stamp on these and then use them for the front of a card or something like that lol

 I made all of the above applying distress inks first (worn lipstick & wild honey) then embossing the diamond background with clear resist & clear embossing powder. Then I used the blending tool again and switched my colors. On the half that had worn lipstick underneath I put wild honey and so on then gently wiped off the excess. Then for the tag I embossed on the stamped image and then misted it all with sunflower sparkle perfect pearl mists


Saturday, October 16, 2010

A Couple of Layouts & Cards

Here is a 2 page layout I did about a month or so ago when my friend Jill came over to scrapbook :)
Here is a couple of 2 page layouts of my beautiful daughter Sasha!


 Here are a few cards that I have made in the last year or so and still love lol


Altered Picture Frame

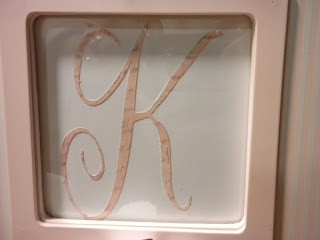
I picked this frame up at a yard sale for $1. I love yard sales! I used the Tim Holtz Tattered Florals & Flourishes dies, and then cut the K with my new Ecraft! (Have I mentioned I love Tim lol) oh and my new Ecraft :D


I also found the KAT letters at Goodwill for pennies so of course I had to have them to alter too! Also a piece of advice craft glue dots stick to painted drywall instantly lol my K is a little high but I hung them up there with glue dots and when I went to move it, it started ripping the wall so I guess the K will just be high lol


My Tim Holtz Altered Photo Box

Of course I started to take some pictures of things for the blog and the camera battery died lol so luckily I took these pictures the other day so we will start here. I made this back in August when Reba was here.
OMG I just love that Tim came out with Pink paper!! So here is a blank photo box that I collaged with modge podge :) I am going to try to start making cards to have on hand ya know for birthdays and such and maybe even get an early start on Christmas lol ya I know right lol but anyways this is where I will store them :)
The top corners look crooked because right now they are only on with glue dots while I decide if I like them or not lol


Summer is Over

Well it's been awhile since I've been here! It was a very busy summer for me, right after I put this blog up my mom got sick so I spent a good part of the summer taking care of her. Then my friend Reba came to visit from Oregon! Then our helper went on vacation so I had to work with hubby (but that was only for a week lol) so now mom is good, Reba is back home, Helper is back from vacation and here I am back in my craft room! A lot has changed in my room since I last posted too! So watch for some update post, starting today!


Friday, April 16, 2010

My First Comment!!

Ya I got my first comment! Thank you KayKay! Now since I am new to all this I thought I would post my reply to Kay since I tried to comment on the blog and it wouldn't let me and I'm not sure if the email will go threw because it said noreply so here is my reply :)


Hi Kay & Thank You!
The counter is just 2 oak boards that we picked up at Home Depot stained and clear coated, they are 31 1/2" deep so that I could put things on the back of the counter and still have plenty of room to scrap a 12x12 layout :)
The two filing cabinets that you see on each end are actually almost as deep as the counter so they are the main support and then the floss cabinet that you see in the middle (sitting on a wooden crate from Michele's) is also acting as a support. since the filing cabinet and crate are not as deep my husband also put a 2x4 board in the back of it that goes from the floor up to the bottom of the counter. The seam from the 2 boards actually runs down the middle of the counter under the green lace table runner that you see ;)
You could also support the counter by using the craft cubes from Michele's that you see on the top of my counter, when you stack them 2 high they are the perfect height for a counter, if you gave yourself enough space on both ends of the counter to open drawers you could point the drawers out and run them all along the sides (did that make sense lol) I hope all this helped and if you have any other questions please feel free to ask :)
Kathy

Thursday, April 15, 2010

Updated the Slide Show!

Just a quick post to let you all know I have been super busy this past week but I did get some pictures taken today and uploaded into the slide show at the bottom of the page so enjoy! I will try to post tomorrow and explain some of the pictures :)

Wednesday, April 7, 2010

Goodwill Finds

I thought I would share a couple of goodwill finds that I found for my new room :)

At first I thought this was a bunny but after really looking at it I think it's a girl lol...either way it's cute!


This phone was very yellowed from smoke, so I cleaned it off and it is still yellow so the white spot on the cord is from me deciding what type of paint I want to use on it to make it white. The silver stands out because that part is actually done :D .......gotta love T!M lol I used silver alcohol ink :D


This is crooked in the picture but you get the idea lol
My Awesome friend Jill found the shelf at goodwill and I found the tins :)


I found the runner, the vase, the bottles and the mini album set all at goodwill too! I am using the mini albums to put my small $1 clear stamps in :)......and the greens in the picture suck lol, the runner and the wall are actually much nicer in person.